Wednesday, November 16, 2011

Motivation

Maybe these pictures can offer some inspiration. 
          Thank you to our service members now and past who have honorably served our country. 
Frieze in St. Mary's Church at Fountains Abbey
 I'm in the middle of decorating for Christmas.  The house is cluttered with full and empty boxes.  We have the same dilemma every year...where to put things.  It just isn't big enough to set decorations out.  Somewhere in the attic, I have a set of Christmas dishes.  They haven't seen the light of day in about 7 years.  Why have them, you say?  Because I love them and if I had to buy them today, they would be too expensive.  So, there they stay for the time being.   
  My pumpkin yielded 3 pies and I still have about 1 1/2 cups of pulp left to use.  Maybe soup today?  Have a  Happy Thanksgiving. 

Sunday, November 6, 2011

Scotland


How about these for motivation??


 Ben Nevis
Eilean Donan Castle

 Glamis Castle


Wednesday, October 26, 2011

Finished

When my machine is not in use, I like to cover it to keep the dust off.  It came with a carry bag when I bought it, but I don't want to take it out of my sewing table and put it in the bag each time, so I came up with this cover/cozy.   It was an easy pattern, however, I had to alter the calculations just a bit on the instructions for the angled pieces in the spool and under the arm.  The back is the exact same as the front.  The embellishments include 2 black buttons for the knobs and 2 buttons sewn together on the very top so it's easy to pull off.   This is another one of my "fly by the seat of my pants" type projects.  I roughly sized up my machine by noting the height, length and width and chose the pieced sewing machine block that I found online at the fabshophop.com website.  This is a 12" finished size block, so I made 2, one for the front and one for the back.  I added the black strips to each side of the blocks to get to my length measurement.  The black and white diamond fabric for the gussett was measured according to the width measurement.  I sandwiched each section (front, back and gussett) with batting and backing and quilted each piece.  Then, I sewed the sections together and bound the edge with a black binding strip and finished with the embellishments.

Something Sweet

There is something about Bisquick.  I've used it for nearly 30 years.  As a newly wed, it was a quick solution to making easy meals.   In a pinch, I sometimes bought the cheaper brand, but it just wasn't the same.  Years ago, I used to send away for the little cook booklet with a box top and postage that many brands offered. I remember it coming in the mail and always being surprised at how thick the booklet was and marveling at all the great recipes inside.  I wore the Bisquick booklet out completely and had to throw it away.  Deeply regretting this move, I emailed the company and asked about a particular recipe, but they didn't have it in their archives.  So I searched and searched through my recipe box as sometimes I would write a card out and put it in my box just in case I ever lost a really good recipe or couldn't find it again in the booklets I had accumulated.  I am glad I did this routinely as I found the missing recipe misfiled and would like to share it here with you so you can give it a go and see if you think it's worth treasuring.  I still have some of the booklets and recently my DH has bought me this wonderful Bisquick cookbook.  Now to make some coffee and enjoy some easy homemade danish pastry. ;o)

Bisquick Raspberry Braid
3 oz. cream cheese, room temperature
1/4 cup butter or margarine, room temperature
2 cups Bisquick mix (regular or reduced fat)
1/3 cup milk
1/2 cup raspberry jam (or any favorite jam or preserve but not jelly)
egg wash - 1 egg whisked with a dash of water
Icing - recipe follows
Preheat oven to 425 degrees F. Or 200 degrees C.
In a mixing bowl, combine cream cheese and butter.  Cut in Bisquick until crumbly.  Stir in milk until combined.  Turn out onto a floured board and knead 8 to 10 times.  Roll dough to a 12"X8" rectangle.  Turn onto a parchment paper lined baking sheet.  Spread the preserves down the center of the rectangle of dough.  Make 2 1/2" cuts at 1" intervals on both long sides of the dough.  Do not touch the preserves.  Fold strips over the filling which will look like a braid.  Brush with egg wash.  Bake in the center of the oven for 12-14 minutes or until lightly browned and done in the center.  Cool slightly then drizzle with icing.   Store covered in the refrigerator.
Icing:  1 cup powdered sugar, 1/2 tsp. vanilla extract, 1 Tbsp. soft butter, 1-2Tbsp. milk or enough to thinly drizzle over the top.  Blend all ingredients together in a small bowl.

Thursday, October 13, 2011

On Retreat

Quiltworks is the best place to stay for quilt retreats or taking classes on offer.  DH and I just got home from a 5 day retreat.  I spent nearly every moment at my machine while DH found himself immersed in his novel or off on a hike.  There is plenty to do in the area and is a central location to the Lakes District.  Please go here to find this wonderful studio in the beautiful county of Cumbria. 
I worked on my own UFO's and was inspired by other talented ladies.   In August, I took a Kate Dowty class and made this pebble wall hanging which I call Sweet Wells.  Sweet wells is one of the many becks in this area.   
At retreat I started and nearly completed a sewing machine cover; and  a 12" square block which will be a calendar top.  There will be several more of these made and will be changed with the months.   A small doll size pillow/sample which has applique, piping and a ruffled edge, but it's not finished yet.  I also started quilting the maple leaf quilt I've shown in a previous post.  It is so good to just think sewing/quilting the entire time and not have to drop it all to make a phone call, go shopping or prepare meals.  There are no distractions here if you don't want them and plenty of inspiration.  If you've never been on a retreat, I highly recommend finding one in your area and meeting other talented people or go with your own group.  It's therapeutic.  ;o)

Thursday, August 25, 2011

Tiles

I've always loved tile mosaics old and new.  In grade school, our class had to make mosaic plaques and remember it being so much fun.  Seeing mosaic floors in churches, museums and Roman ruins has given me inspiration and the desire to try out the technique in quilts.  I bought the book "Tile Quilt Revival" by Carol Gilham Jones and Bobbi Finley.  It contains a brief history and instructions on making the projects in the book along with patterns.  I am making the quilt "All in a Dream" which I thought would be an easy project to get my feet wet.    My "grout" lines don't look perfect, but I really like the look of this quilt.  The idea was to make each block with a warm and cold side as well as mixing dark and light. 

The borders will be a yellow stripe all around.  Juliet will long-arm quilt for me and when it returns I will post a final picture. 

This Asian square quilt is also finished.  My son likes the outcome and has hung it in his bedroom.  I dismantled the entire thing and took out the glaring white and added the black and red sashing strips.  The green cornerstones were also added.  My son loves the center symbol, which is thread painted.  Look back a few posts to "Time Out" and you will see how this top was returned to me from the round robin.   Since this was always meant to be for my son, he had the final say in what it should look like, so I don't feel bad that it was dismantled and redone.  He has to live with it afterall.  

Have an inspiring day ;o)


Sunday, June 12, 2011

Row quilt


Blogger doesn't like me.  I can't get my pictures to load properly and they always import cropped or turned the wrong way.  Any help would be appreciated as I find this extremely frustrating.  Anyway, here is my row quilt and I LOVE it!  Months ago I wouldn't have said that at all about this quilt, but now that it's done and quilted  I absolutely love it.  Juliet did a fantastic job quilting it with a continuous line bumble bee pattern.  So on to the next UFO to finish.  

Here are more pictures of my "ugly" quilt after Juliet long arm quilted it for me.  The pattern is a continuous line design and called "Coxcombe" (sorry it's not easy to see, partly due to the colorful patterned fabrics I used). 


A little treat to leave you with:
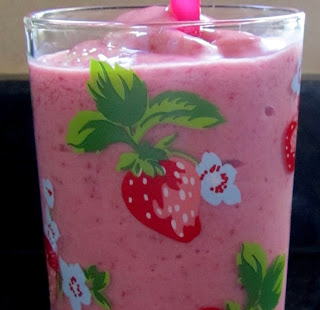
 Ahhh, a nice cool strawberry smoothie!  Simple and delicious.
1 cup frozen strawberries
1 banana
1- 11/2 cups milk
1 tbsp. sugar
Place all ingredients in a blender and blend until smooth. 
Enjoy!  ;o)


Wednesday, June 8, 2011

Time Out

I love this orange poppy.  It was taken with my Canon Power Shot SX210IS pocket camera.  

Being stuck at home recovering from my surgery hasn't been an easy road and certainly not the "free" time I thought I would have to work on my UFO's.  But the baby steps to getting better has given me a few minutes each day to spend in my sewing room at the very least contemplating what to do on the UFO's and making notes for when I am well enough to sit, bend, stretch, get up and down to iron and so on.
Juliet long arm quilted my Ugly quilt and did a stellar job of it.  It's brilliant and I love it! 


This is the Round Robin piece that my Friday quilt group was doing for the past 8 months. Each person works on one step then it gets passed to the next person to work on.  My top was using my fabrics which were washed and ironed to start with.  My starting block was the lantern in the upper right corner.  Since this wall quilt was for my son, who loves all things Asian,  we have discussed the top and he wants to make some changes. So, I will be busy unpicking some of the things and adding what he wants to it.  I will post some pictures later as I progress on this project. 

Before surgery, I finished the row quilt!  YEAH!!!  I can't believe it took me nearly 10 years to complete.  Too many times I set that top aside and moved on to something else.  Well, I am happy to say it is off to Juliet to quilt for me.  I will post pictures as soon as I get it back from her.  
Make some time today to do something you love.......peace.  ;o)


Friday, February 25, 2011

UGLY quilt

This is my ugly quilt.  While I was sewing it up, I wasn't too fond of it. But I put it away to the bottom of my UFO basket. Two and a half years later, I dug it out and laid it down on the floor,hence the odd angles of the picture. This is where I put all my quilts to ponder what to do next to them. It only took a few minutes to decide what to do for the borders and before I knew it, it was done. This quilt is a large full size bed quilt and not quite a queen.  Off to Juliet it went for her to long-arm quilt for me. I can't wait to get it back. I call it my UGLY quilt only because I don't think anyone would choose all these wild patterns and colors for one quilt.


My Friday quilt group is doing a challenge and is due in March.  It is a green and muslin/calico challenge.  I don't like the muslin part of it and am thinking about trying to paint, stencil, dye, or somehow change the look of the muslin.  The piece only has to be 6" X 24" which actually sounds like a table runner to me.  What else will I do with this when it's completed?  I also had a thought about trying the portrait technique and doing the three of us (DH, DS and myself).  The good thing about using the muslin is it's extremely cheap compared to better quilting fabric so if it doesn't turn out it can just go in the bin.  

The next quilt to finish in my UFO basket is this maple leaf wall hanging. These blocks were won 12 years ago when I belonged to a guild group.  Yes, 12 years ago.  After resizing each block I added the sashing strips and will machine quilt it.  There are no outer borders, I just don't think it needs anyting more.  Today I will sandwich and ready it for my machine. My DH didn't like the yellow leaf.  It's the unexpected element and gives it more interest, so it's staying as is.   ;o)

Saturday, February 5, 2011

Gallery

Ok, time for some pictures.  I realized that I haven't been showing you what I've been doing.
Friend's quilt - small wallhanging
This is the finished log cabin inspired quilt I talked about here.  My friend loved it and by the way, I wrapped it in zebra tissue paper with a big wired silver bow.

Pre-printed Valentine Postcards
  These are actually pre-printed fabric Valentine postcards that I embellished with stamping, pigma pens, stitches and buttons.  I hope they make it through the mail.  The only bad part about them is that the size is 5"X7" and I think that is just too large. 
I am still having some trouble on my row quilt which has been in my UFO pile way too long.  I have worked slowly on it and posted some of that work which is here .   The houses didn't look right so they're out.  I tried a teacup and don't like it so it's out.  Now what?   I will keep looking for some applique blocks or paper pieced blocks.  I've been trying to keep them all about the same size which is  + or -  51/2 " to nearly 61/2" square.  Please give me some ideas, links or whatever advise you can offer me.  I only wanted 2 more rows and then 2 outer borders.  I already know what I will do for those.  

Hugs and Hearts work in progress
Remember this one?  It was suppose to be a hugs and kisses, but if you notice I only have one X on this top.
I omitted the others because I thought they were just too dark and off.  The blocks are sewn into rows but the rest is just laying on my floor, I'm deciding on borders and/or applique in the borders. 


Love paper - pieced block
I found this cute little paper pieced block online.   Was thinking of a postcard, but it is a little large at nearly 6" square.  So, I will save this and use it in a future project. 
Yesterday I was working on my portion of the round robin my group is doing.  I am making flying geese blocks, so I have 1" half square triangles all over my workspace.   Maybe I just have too many things in progress?    But, at least it's forward progress.

Wednesday, January 19, 2011

Present-ing a Quilt

My studio is always so cluttered and messy.  Yesterday, I spent a lot of time cleaning up and putting away so that today I can get in there and sew the day away.   I have to finish the friend's log cabin feel quilt and get it wrapped up.  How do you wrap your quilts for transport?  Whether it's going to the long-arm quilter or your
best friend across the street, how do you present it?   When my mother got her birthday quilt in the mail 4 years ago, she was surprized by a beautifully wrapped red foil box with red tissue covering her red and white wall quilt.  Of course, red is her favorite color, so I just had to go overboard with it.  She loved it. 

The poppy quilt in a previous post was presented to a friend who has since moved to Texas.  She was surprized with a mail tube covered in rose flowered gift wrap.  Inside I had rolled the wall size quilt to fit.   She loved it, and could easily mail it if she needed to. 

This will be my dilemma today...how to present this quilt to my friend....any suggestions?  ;o)

Wednesday, January 12, 2011

New in the New Year

My last post was all about finishing what I've started.  Here we are, a week into the new year and I can't keep that resolution.  However, I did sew up a wall hanging top yesterday.  This is a gift for someone, so I will not post a picture here or tell you much about it.  But it is not a cheater quilt.  It has a log cabin feel to it.


The quilt group I belong to make "quilted" postcards every other month and sent to other members who have made one.  I am starting on this as well.  They have to be completed by the first week in February, so if I
don't move on it now, they just won't get done.

Catherine's Wheel

 I posted December 17, 2020 about making an ornament which is called prairie wheel (USA) or Catherine's Wheel (UK).  The latter being of...