Sunday, October 30, 2016

Tangled Biscornu


I checked out this book from our public library.   After opening to the first few pages, I knew this was going to be a great beginner's approach to zentangling a quilted project.  The tangled doodles in one chapter are easy and fun to practice.  The small projects to apply the tangles are easy and can be completed in hours using the step by step instructions.  I was intrigued by the biscornu, however instead of making a pin cushion, I stuffed the center with pebbles and poly beads to make it a weight to use in my sewing room.  So, how are these made?  Biscornu is a french word roughly translated to irregular shape.  They are traditionally made with aida cloth and cross stitched with elaborate patterns. However, when I saw these on the cover of this book, I just had to find out if it was something I wanted to do.  

Four squares are cut 4" for the white one and 6" for the black one.  Layer 2 solid color  same size squares on top of a batting/wadding square.  Sew all around leaving an edge open to turn right side out.  Layer the last pair of same size squares right sides together on top of another batting/wadding square.  Sew around all edges leaving an opening and turn right sides out.  Sew openings closed and iron lightly.  You can choose to eyeball your design or draw directly on top of the solid color sandwich for your tangled stitching.  Using a contrasting thread, sew your design.  Just remember to use a light handed pencil line, or use a disappearing marking tool.  I chose to eyeball my designs.  To get the irregular shape, you mark the center edge line of each side, so the 4" is marked at the 2" center on all 4 sides.  Now with wrong sides together, hand sew one corner to the center mark taking small tight stitches.    This will make a corner, so turn the piece and sew the next edge from the center mark to the next corner.  Keep going around the piece until you come to the last 2 edges to sew closed.  Stuff with your preferred materials.  Sew the edges closed.  Your stitches will be visible, but you can use a decorative thread to show off the stitches, or cover them with trims or beads.


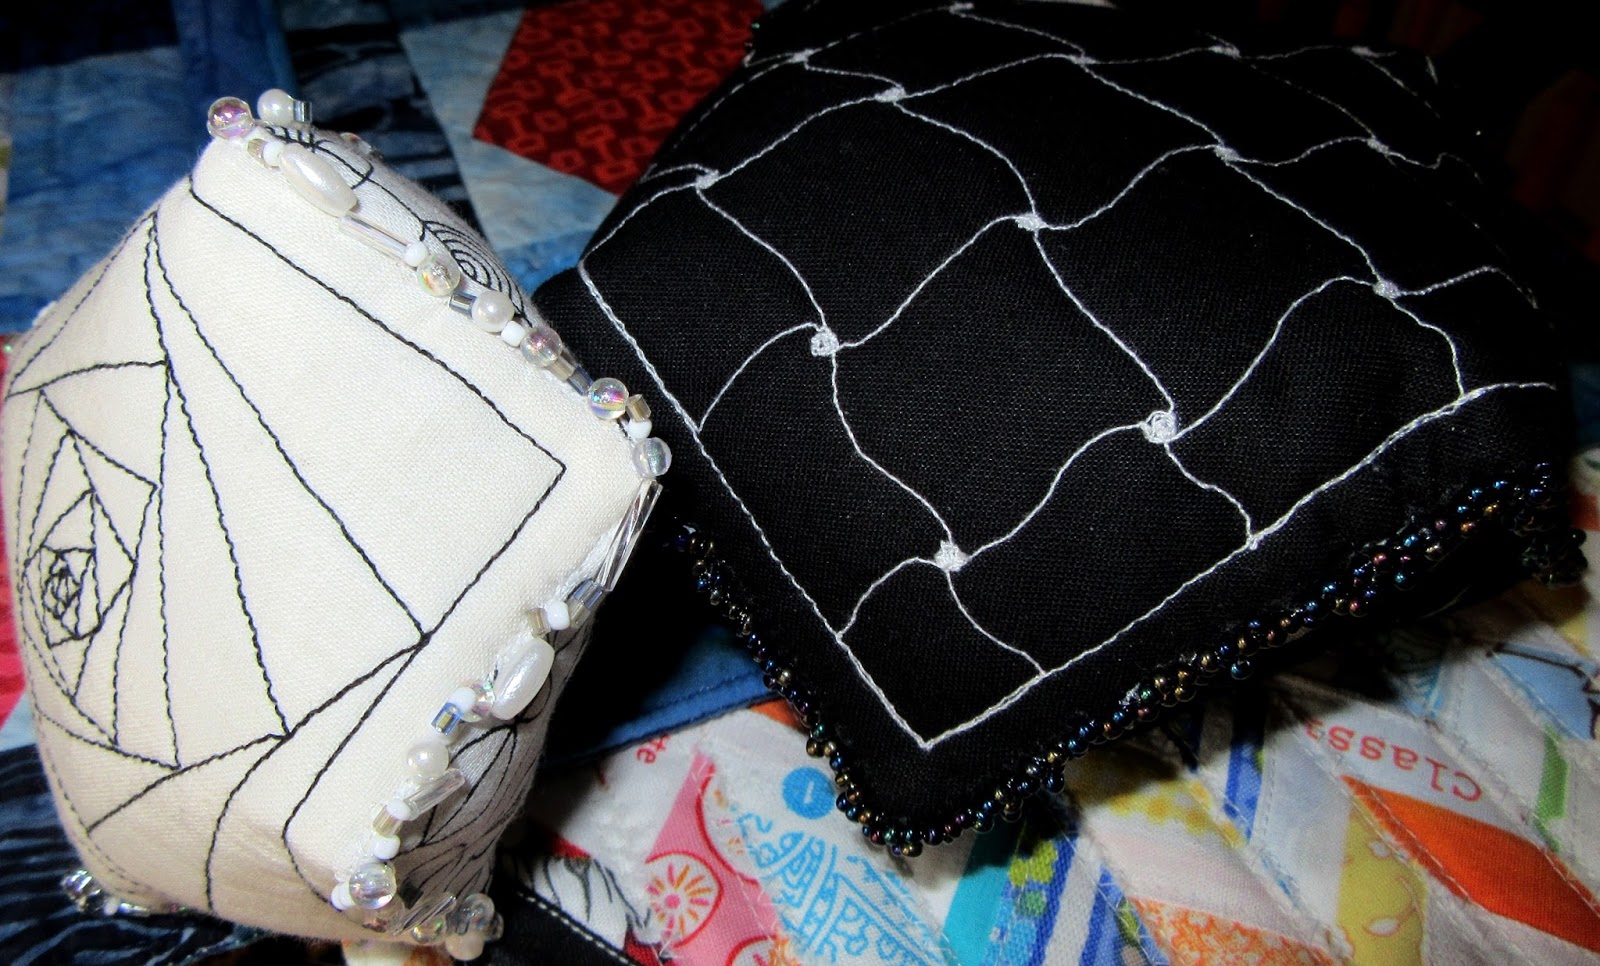
 To finish, I added beads which are hand sewn to all the edges.  Now I use them as paper weights and book weights in my sewing room so I never lose my place in a book or pattern again.  


Thursday, October 27, 2016

In the Midst of Chaos - Finished


I've finished this wall quilt with a black binding and simple random curvy intersecting line quilting stitches using Superior Threads Rainbows thread in a variegated green color.   The quilting lines were achieved by starting in one corner and imagining where I wanted to end up (somewhere opposite), using the selected thread, 14/90 topstitch needle and a walking foot on a medium speed setting.  I didn't use a free motion foot, although you can, but I wanted to try it out with the walking foot to see if I could control the stitching line better than the free motion technique.  It worked better than I anticipated even with some of the lines being very curvy.   Not perfect in a couple spots, but not noticeable either with just a few bumps in my stitching line, which was purely my impatience.  


I love the way the stitching looks on the back and reminds me of tracks made in fresh snow.  Or how ice skating lines look on ice rinks.   If you've never done this kind of free stitching, I would say you have to try it out.  It's like doodling on paper, but you guide or "draw" with your machine needle.  If you think you've made a mistake, just keep adding lines and it won't look like a mistake in the end.  Don't stress out about not following a planned pattern.  Put your favorite music on and enjoy the freedom that flows from your creativity.    :o)

Tuesday, October 25, 2016

In the Midst of Chaos - Improv


In my last post I was sifting through my scrap bag.  I came across some orphan blocks and cut pieces from an improvisation project 2+ years ago.  The quilt I made was called "My Garden Ladder" which is on the right side bar of my blog page.  It was fun, but a little limiting as you are suppose to limit your color choices and stay away from wild prints.  Well, when I found the prints pictured above in my scrap bag and couldn't resist, I just had to revisit the improvisational piecing ideas only this time I still had a few boundaries, but didn't "plan" the whole quilt top layout.   The orphan blocks were placed onto my design board first, then strips cut roughly with scissors in different widths were placed around the blocks.  The large blue wild print was cut into rough squares and strips were sewed to 1, 2, 3 or all 4 edges.  You could mix it up or make them all the same, but I chose a completely mixed up and random order.  Composing the top by making rough squares sewn together to make rows, then sewing the rows together like a traditional quilt top.  Before sewing together the blocks and rows, I took a few digital pictures and made a few changes in layout.  This top only measures 20"X 35" and now I am contemplating borders or no borders.  I haven't thought about how I will quilt it yet, but since there is a lot going on in the wild fabrics, I will probably keep it simple either straight lines or wavy intersecting lines.


Wow, what a difference now in the amount of scraps left in my scrap bag.  Some scraps are too small to sew into blocks or even use for applique, so I may save them for a future small quilt using tiny cut bits under organza and thread painted over the top. Just like the post card quilt above (I have posted about this one before).  It will take a little time, but separating them into zip bags by color will help me save time later.  

The kennel quilts went in the mail last week, but I still have some cut strips leftover.  I'll save them for a future project.  Possibly more improv.  ;o)

Friday, October 7, 2016

Scrap Bag Fun

Do you do this?  Accumulate scraps from every project you've ever done, storing them away for some future use that never really comes?   One day you realize that those scraps have to go.
Here is my nemesis.  Yep, a sea of assorted strips, squares, tiny bits and cut offs from the last few years projects.  I am in the process of making charity kennel quilts for the small animals rescued from the storms in the South East from Hurricane Matthew.  This is the purrrrfect use of those strips and orphaned blocks I've had laying around.  Go here to find out more and join the quilt team.   This is my sewing room as it looks most days I work in it.  I am sorting all those scraps to get to the cut strips, ironing them and setting them aside to make the kennel quilts.  


Of course, charity quilts are just one way to use up those scraps.  I peruse my scrap bag whenever I want to try out a new technique and don't want to cut into a nice new piece of fabric.  Sometimes I get so tired of seeing the same piece of Aunt Grace 30's green print that I have to either give it away or (I hate to say it...) I end up trashing it so I don't have to look at it anymore.  It's part of the problem of buying a yard or more of sale fabrics as some sales require at least a yard cut.  
Scraps are also great for those small projects like pin cushions, crafts, scrappy quilts, improvisational piecing and sandwiches for practicing quilt stitch patterns.  
Reserve some time today to spend in your sewing room.  ;o) 


Catherine's Wheel

 I posted December 17, 2020 about making an ornament which is called prairie wheel (USA) or Catherine's Wheel (UK).  The latter being of...